Launch a new Jenkins Docker agent
General information
In this manual, you can find how to launch a new Jenkins agent in AWS.
The agent setup includes three main things:
- Launching an EC2 instance
- Create a DNS entry pointing to the EC2 instance in Route53
- Installing Docker on the EC2 instance
- Creating a cloud agent template in Jenkins
Launching an EC2 instance
First you need to launch a new EC2 instance in the N. Virginia region (us-east-1). There are some specific characteristics that you should use during launching the instance:
- Name: folio-jenkins-slave<agent_number>
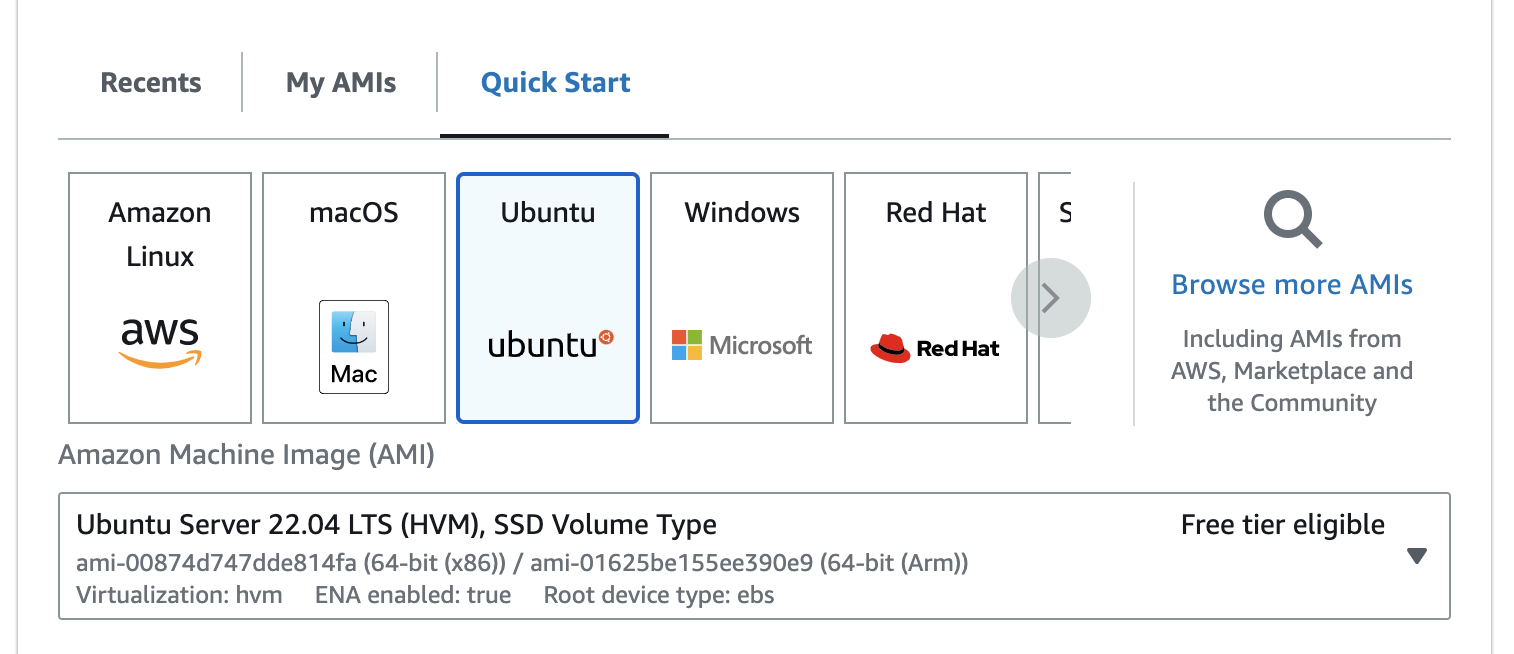
- AMI. You should use one of these AMIs: amazon/ubuntu/images/hvm-ssd/ubuntu-xenial-16.04-amd64-server-<publish_date>. You can't choose it in Quick start tab, so you need to "Browse more AMIs" and then find it in the Community tab.
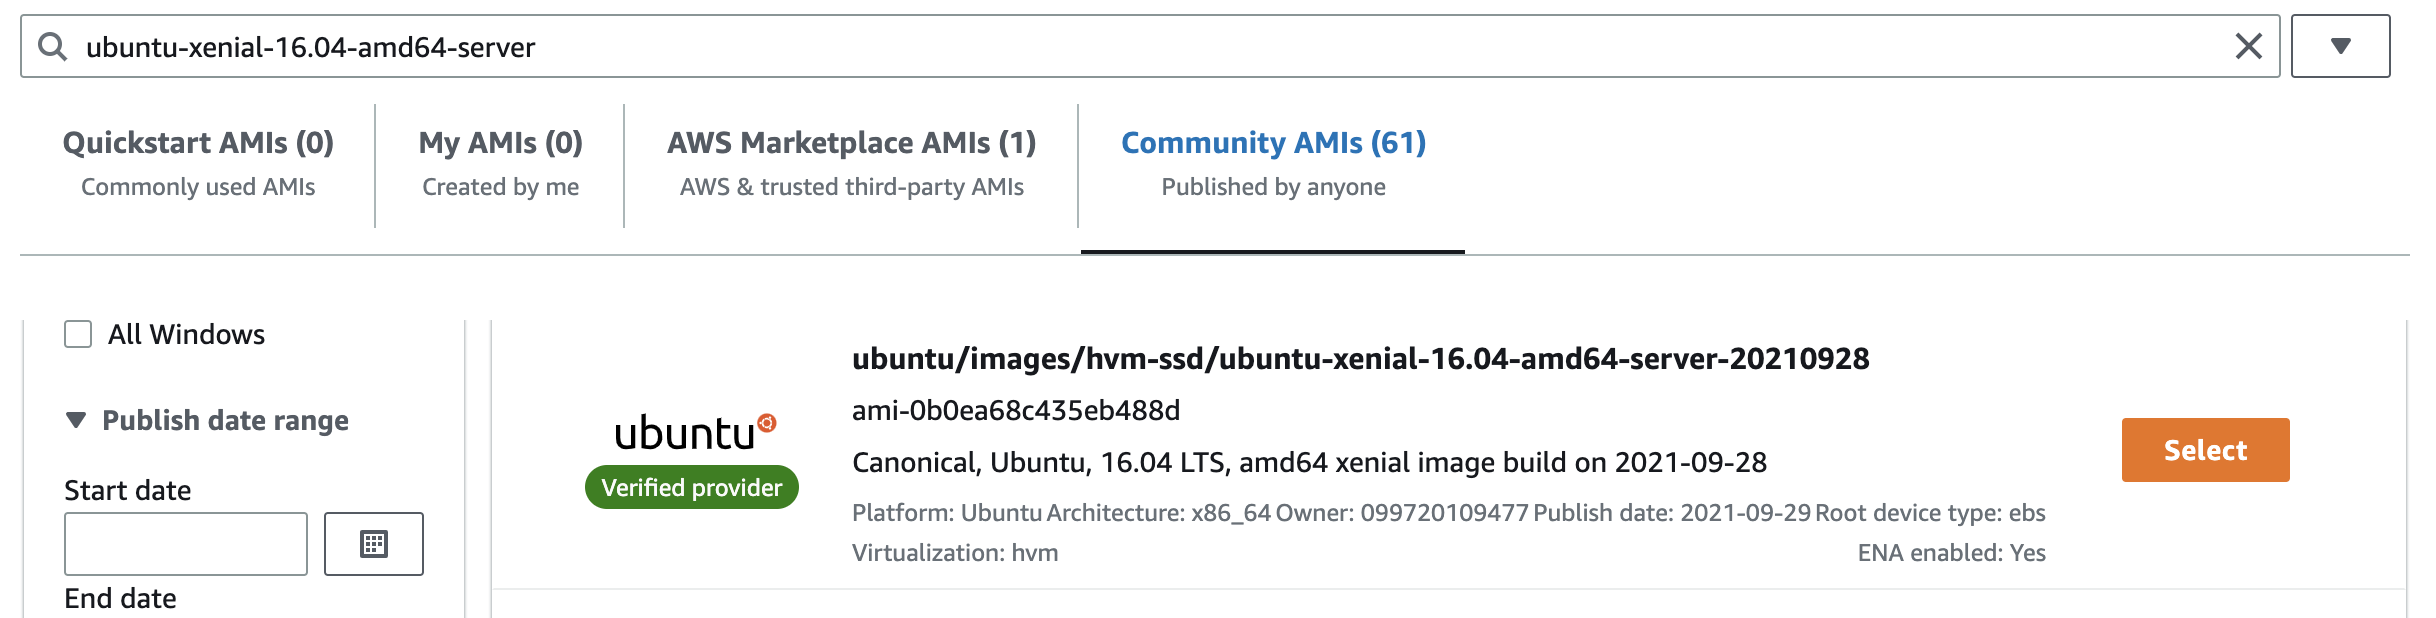
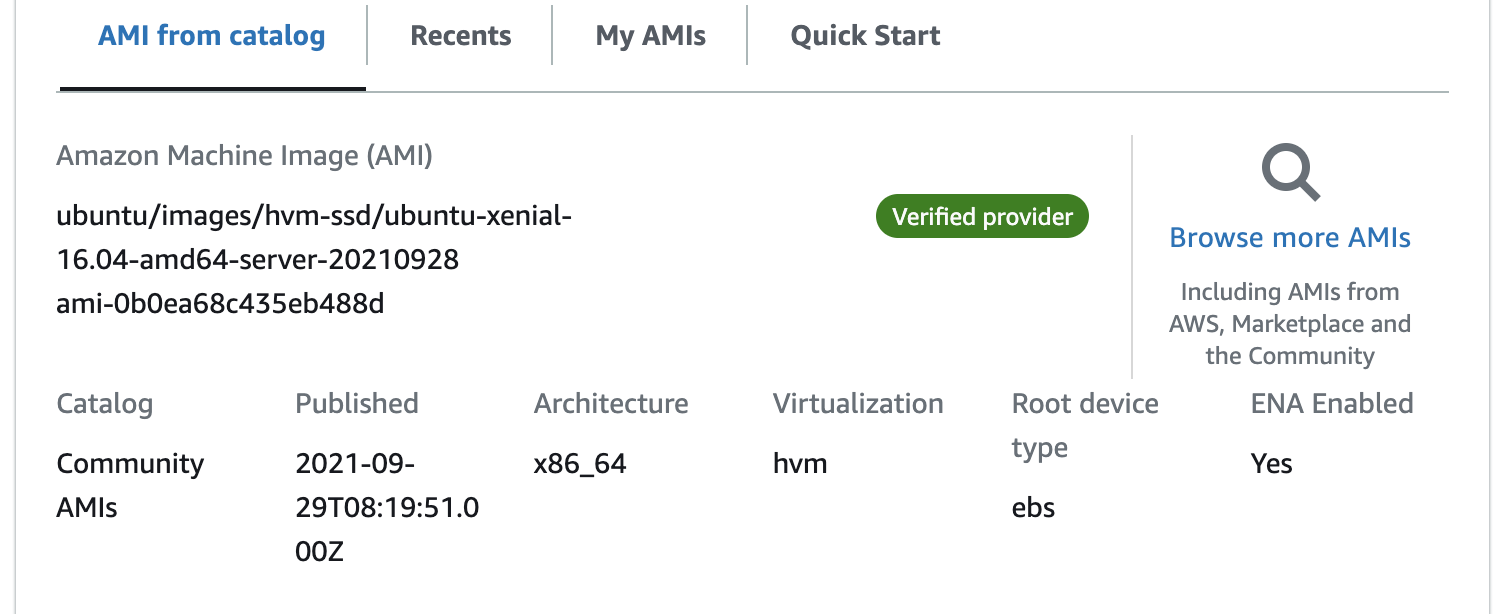
It's highly recommended not to use the latests Ubuntu AMI. It can cause a lot of problems. - Instance type: m5.2xlarge (usually used, but not must).
- Key pair: sling-aws (you can find a private key in the Secret Manager).
- VPC: FOLIO VPC and one of the public subnets from there.
- Select the following existing security groups: jenkins-slave, SSH-only(required only during installation and should be removed after).
- 100 GiB GP2 storage volume.
- Termination protection: Enable (in the advanced settings).
All other fields can be left as default.
Create a DNS entry pointing to the EC2 instance in Route53
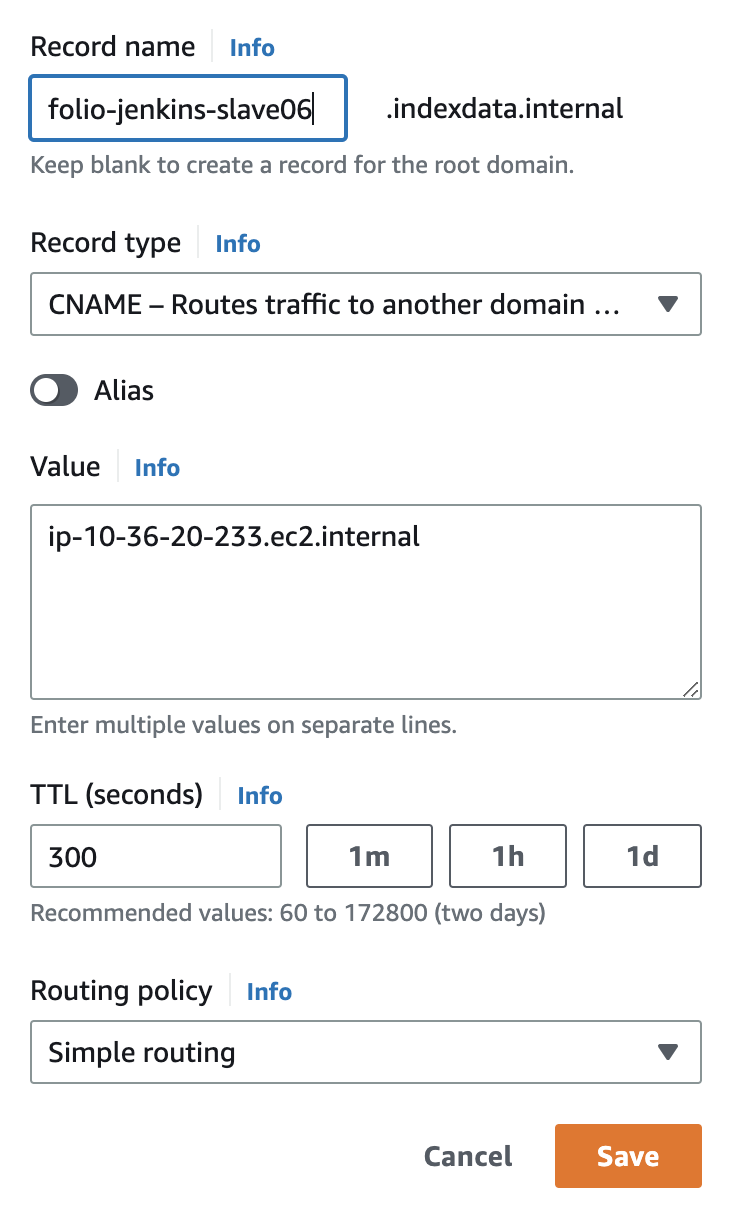
In order not to use an ip address in the future agent template we should create a DNS name that will be pointing to the created EC2 instance. We can use Route53 service for this purpose.
In Route53 we need to create CNAME DNS record in the indexdata.internal hosted zone with the following name folio-jenkins-slave<agent_number>.indexdata.internal pointing to the instance Private IP DNS name. All other fields can be left as default (see the screenshoot below).
Installing Docker on the EC2 instance
There is an official manual in the Docker documentation how to install it on an Ubuntu server: Install Docker Engine on Ubuntu.
Here you can see a summary of the shell commands that you should run for installing Docker:
sudo apt-get remove docker docker-engine docker.io containerd runc
sudo apt-get update
sudo apt-get install     ca-certificates     curl     gnupg     lsb-release
sudo mkdir -p /etc/apt/keyrings
curl -fsSL https://download.docker.com/linux/ubuntu/gpg | sudo gpg --dearmor -o /etc/apt/keyrings/docker.gpg
echo \
  "deb [arch=$(dpkg --print-architecture) signed-by=/etc/apt/keyrings/docker.gpg] https://download.docker.com/linux/ubuntu \
  $(lsb_release -cs) stable" | sudo tee /etc/apt/sources.list.d/docker.list > /dev/null
sudo apt-get update
sudo apt-get install docker-ce docker-ce-cli containerd.io
sudo docker run hello-world #just for checking
sudo systemctl enable docker.service
sudo systemctl enable containerd.service
After installation there are some other required steps:
Make Docker publicly accessible:
Run this command:sudo systemctl edit docker.service
and paste the following settings in the opened file:
[Service]
ExecStart=
ExecStart=/usr/bin/dockerd -H unix:// -H tcp://0.0.0.0:2375
Save it, reload the system daemon and restart the Docker service with the commands:
sudo systemctl daemon-reload
sudo systemctl restart docker
Change docker group id
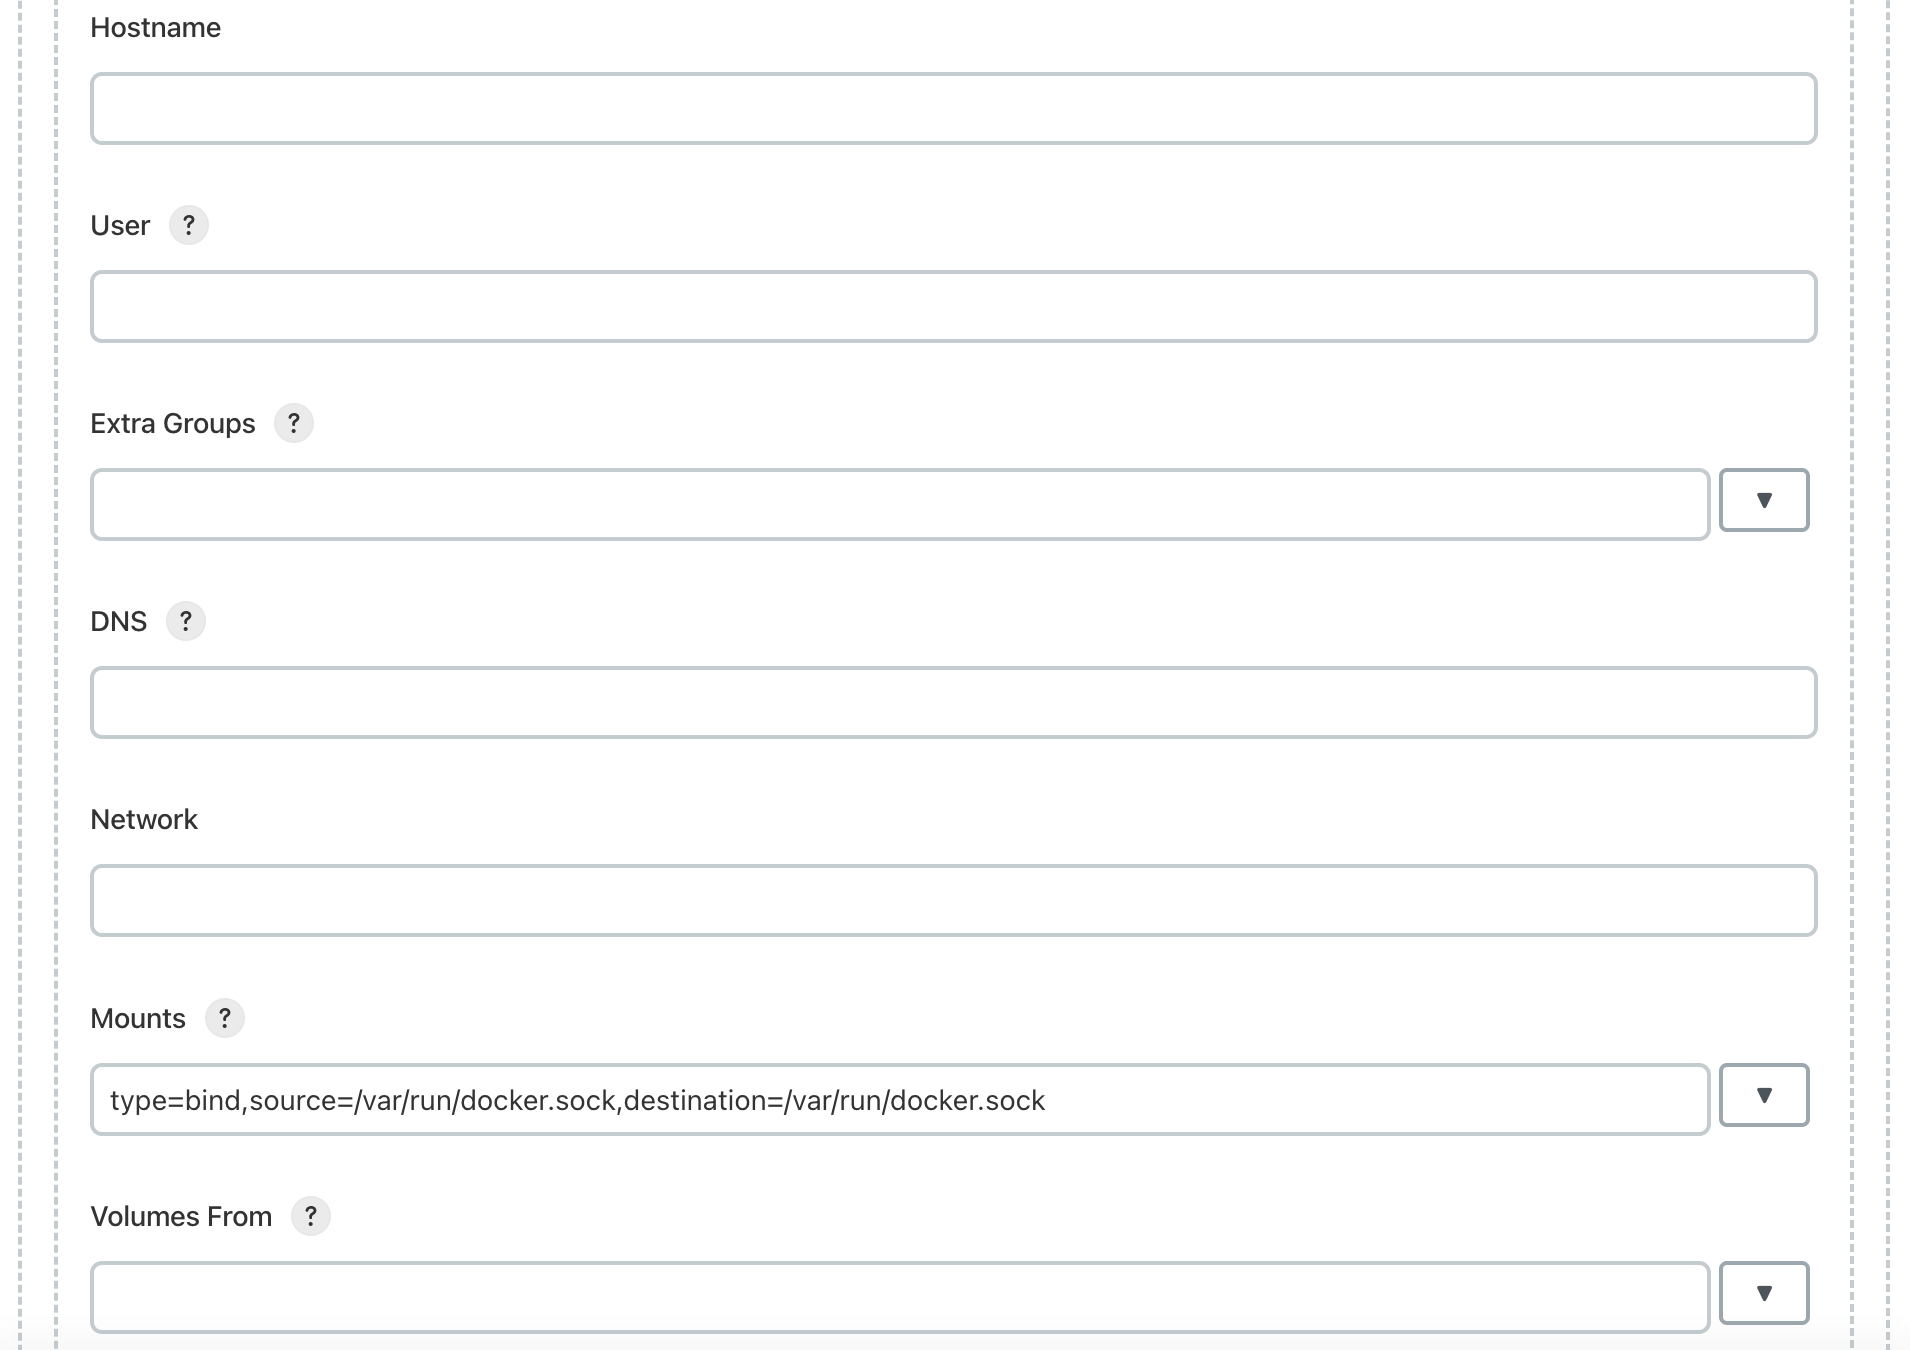
Run these commands:sudo groupmod -g 496 docker sudo chgrp 496 /var/run/docker.sock
This value needs to be synchronised on the agent image (folioci/jenkins-slave-all:java-11) and on the host machine.
Create jenkins user and group and add it to the docker group
Run these commands:sudo groupadd jenkins sudo useradd -g jenkins jenkins sudo mkdir /home/jenkins sudo chown jenkins /home/jenkins sudo chgrp jenkins /home/jenkins sudo usermod -aG docker jenkins
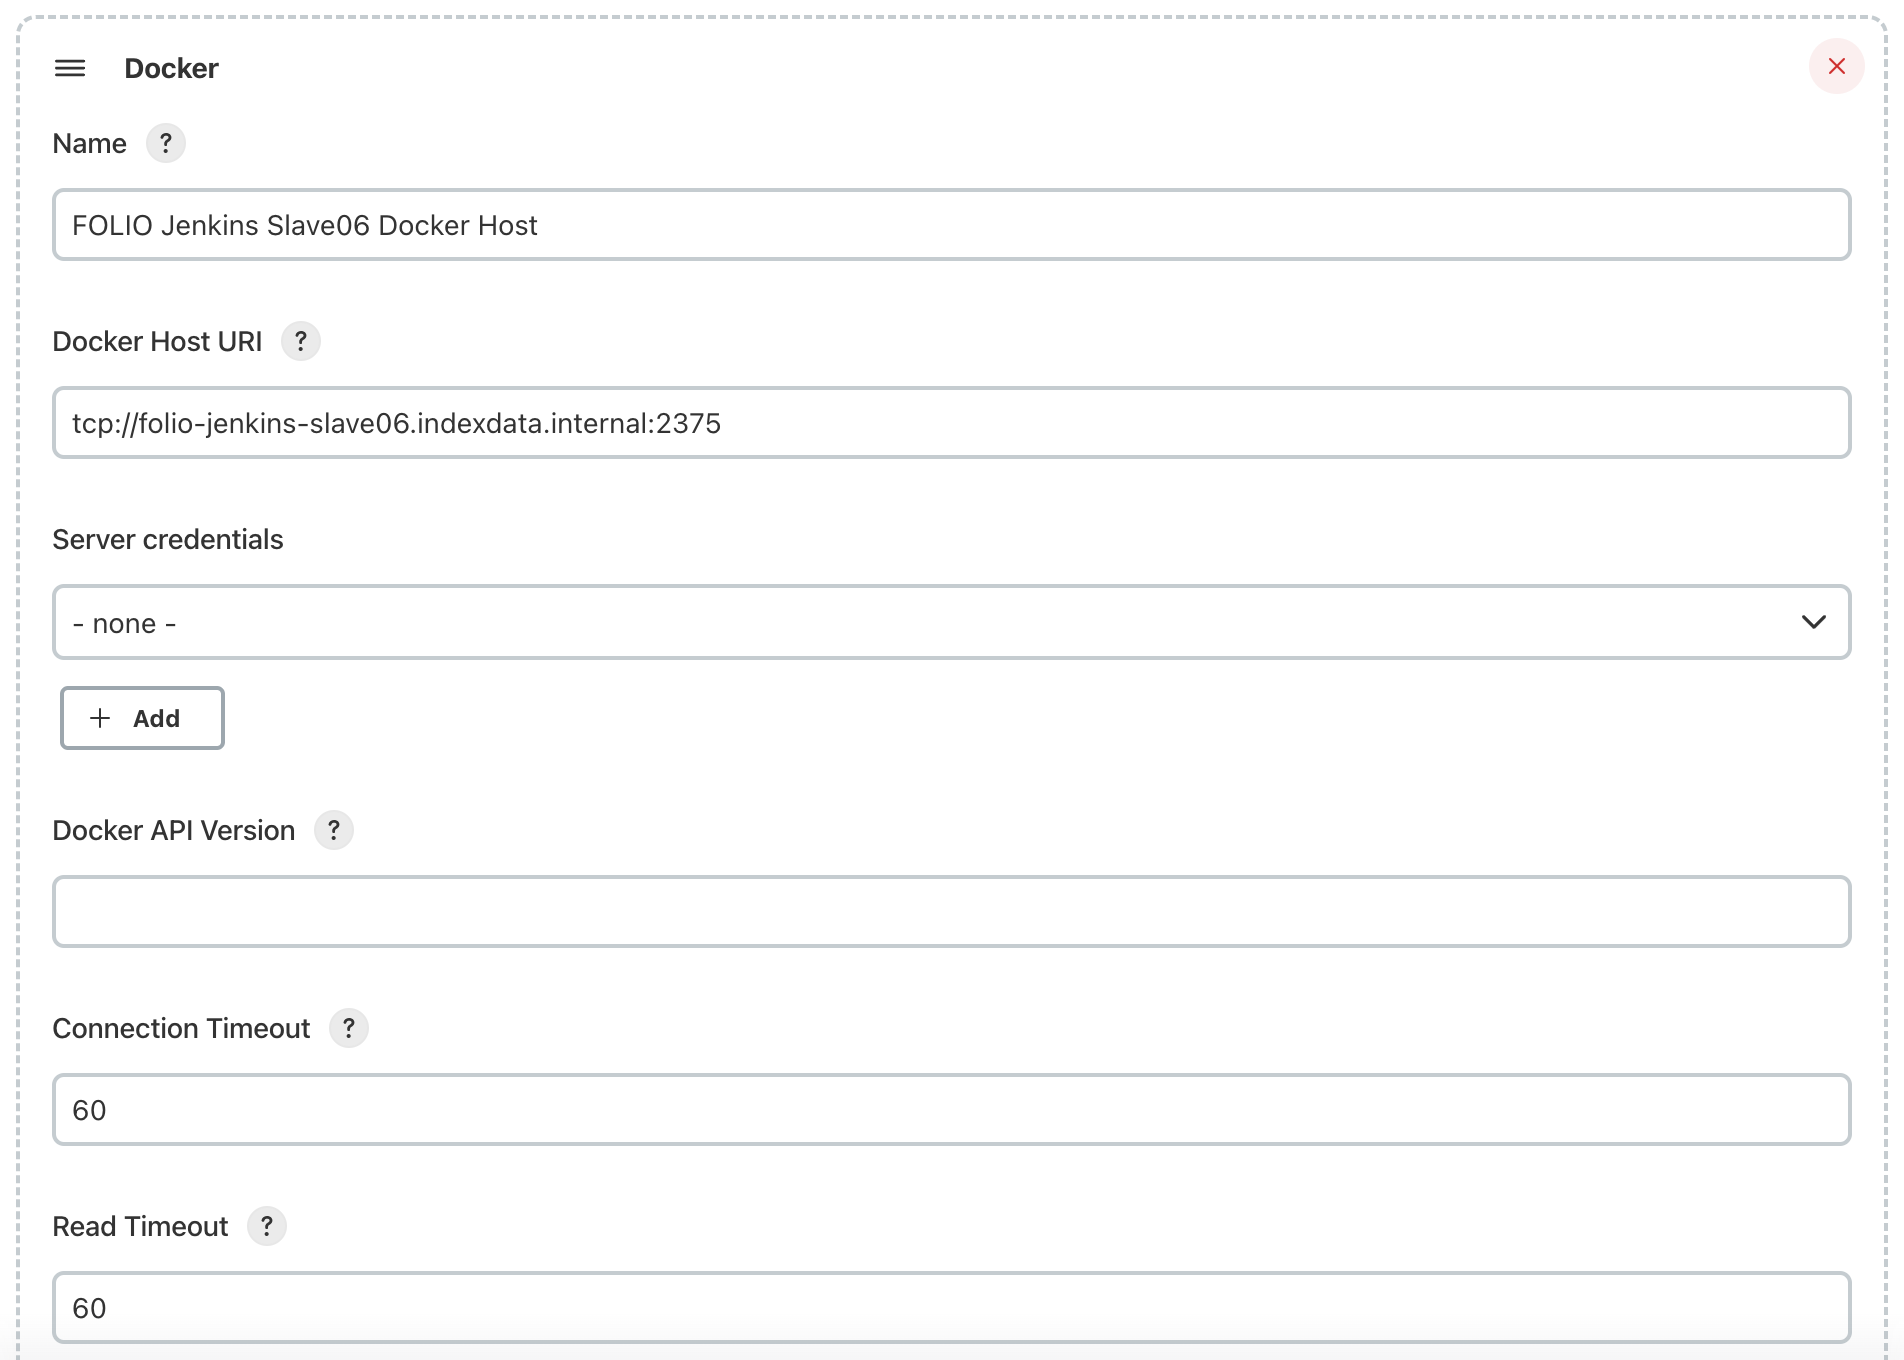
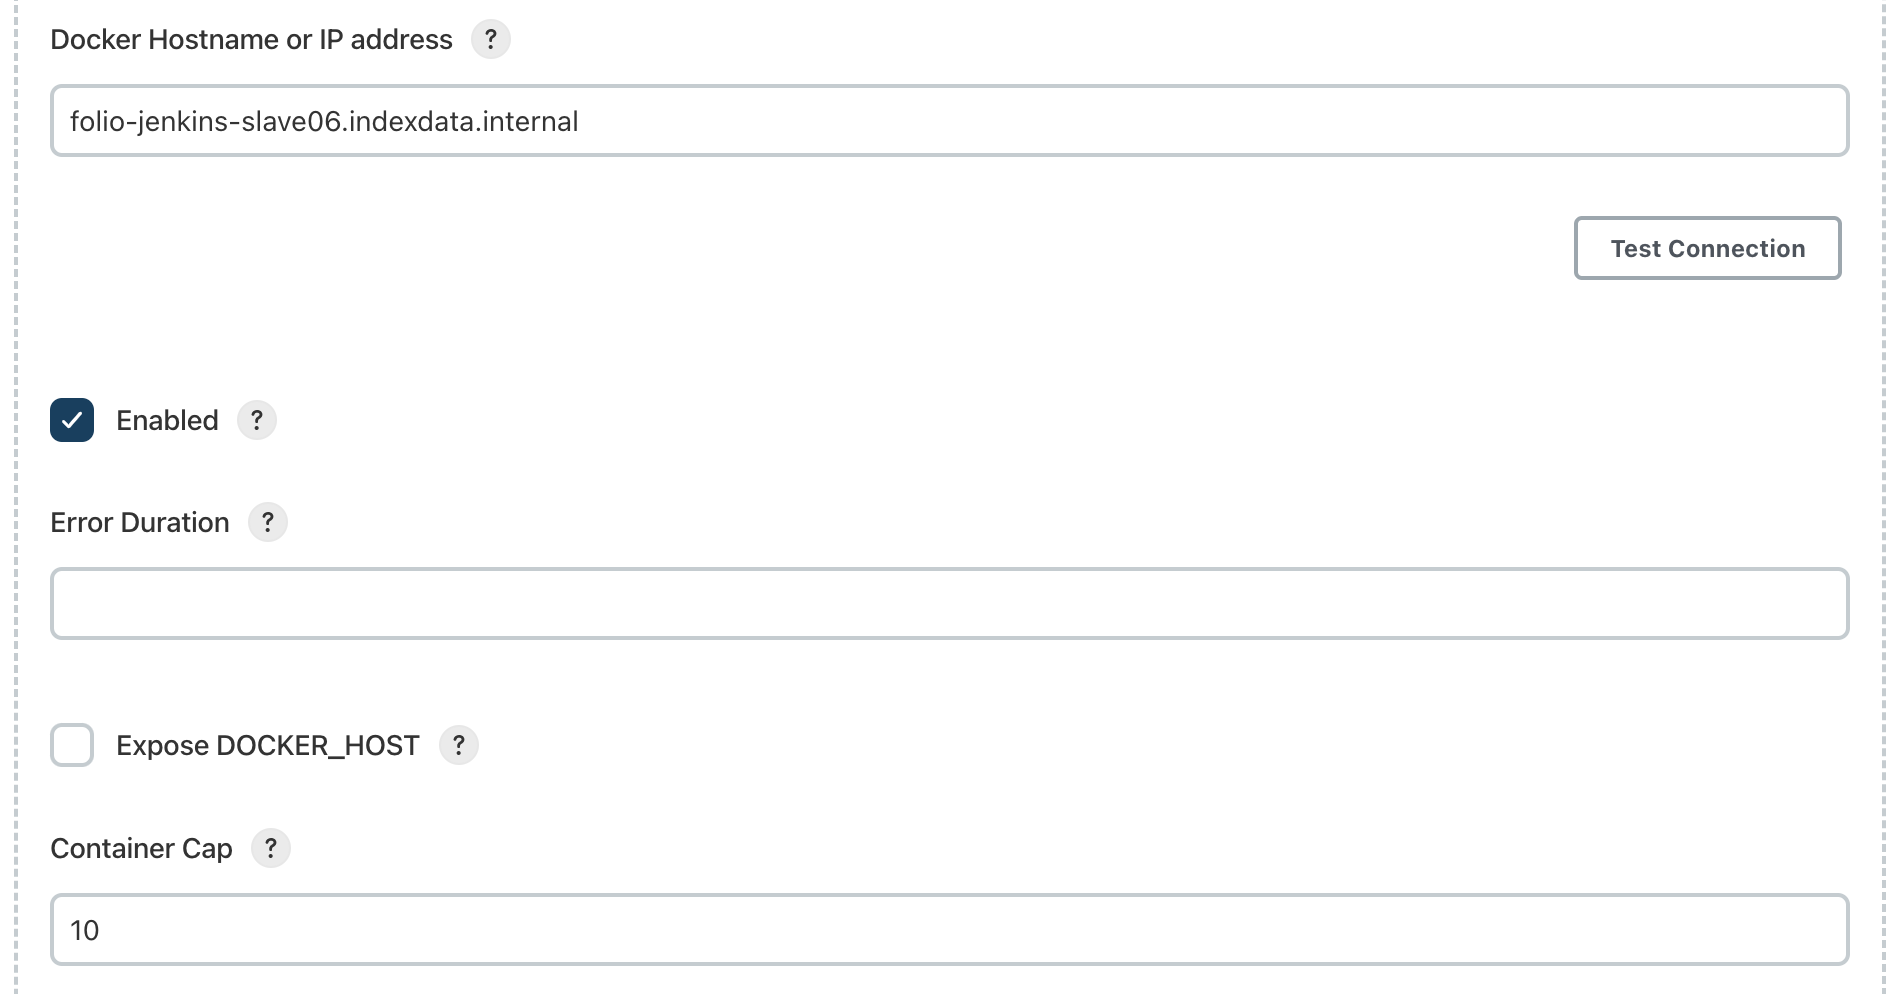
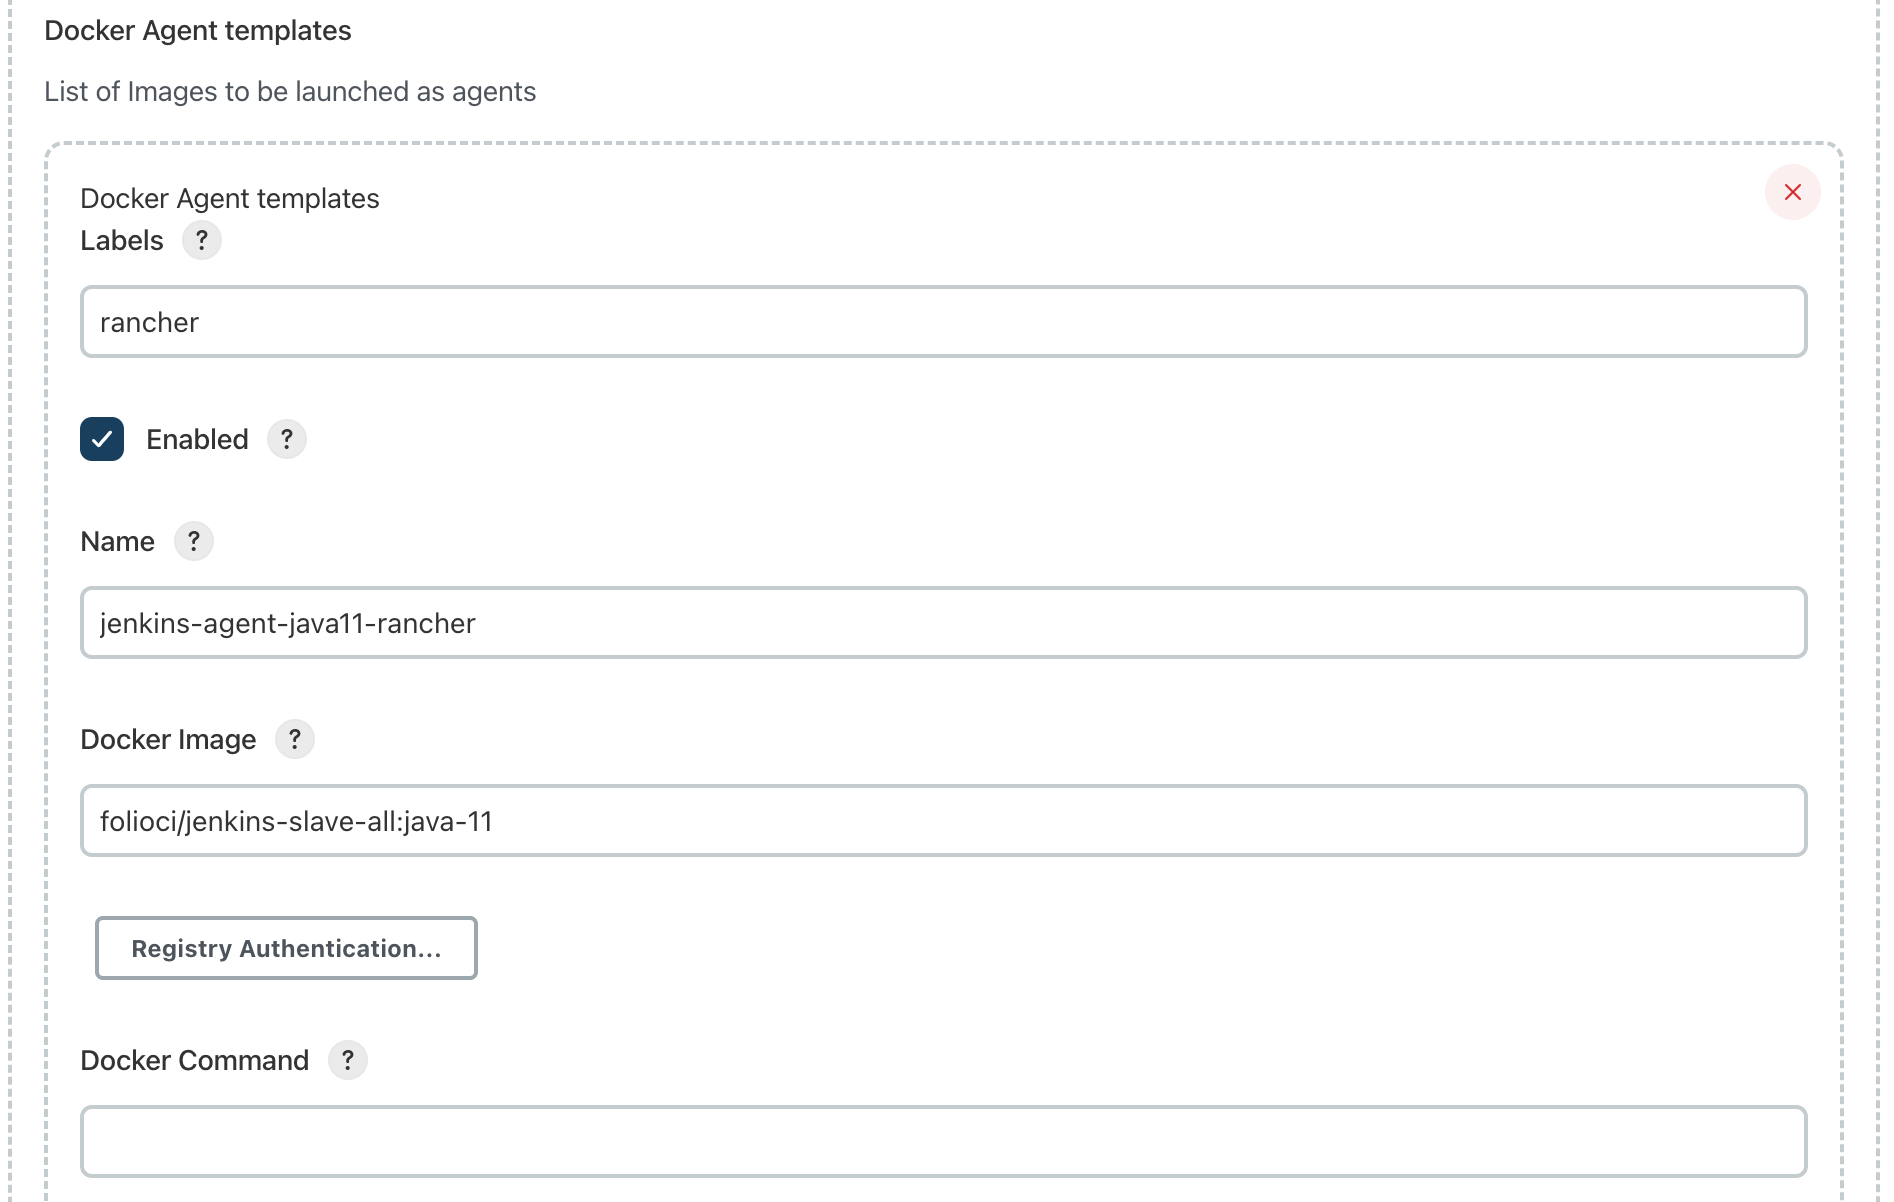
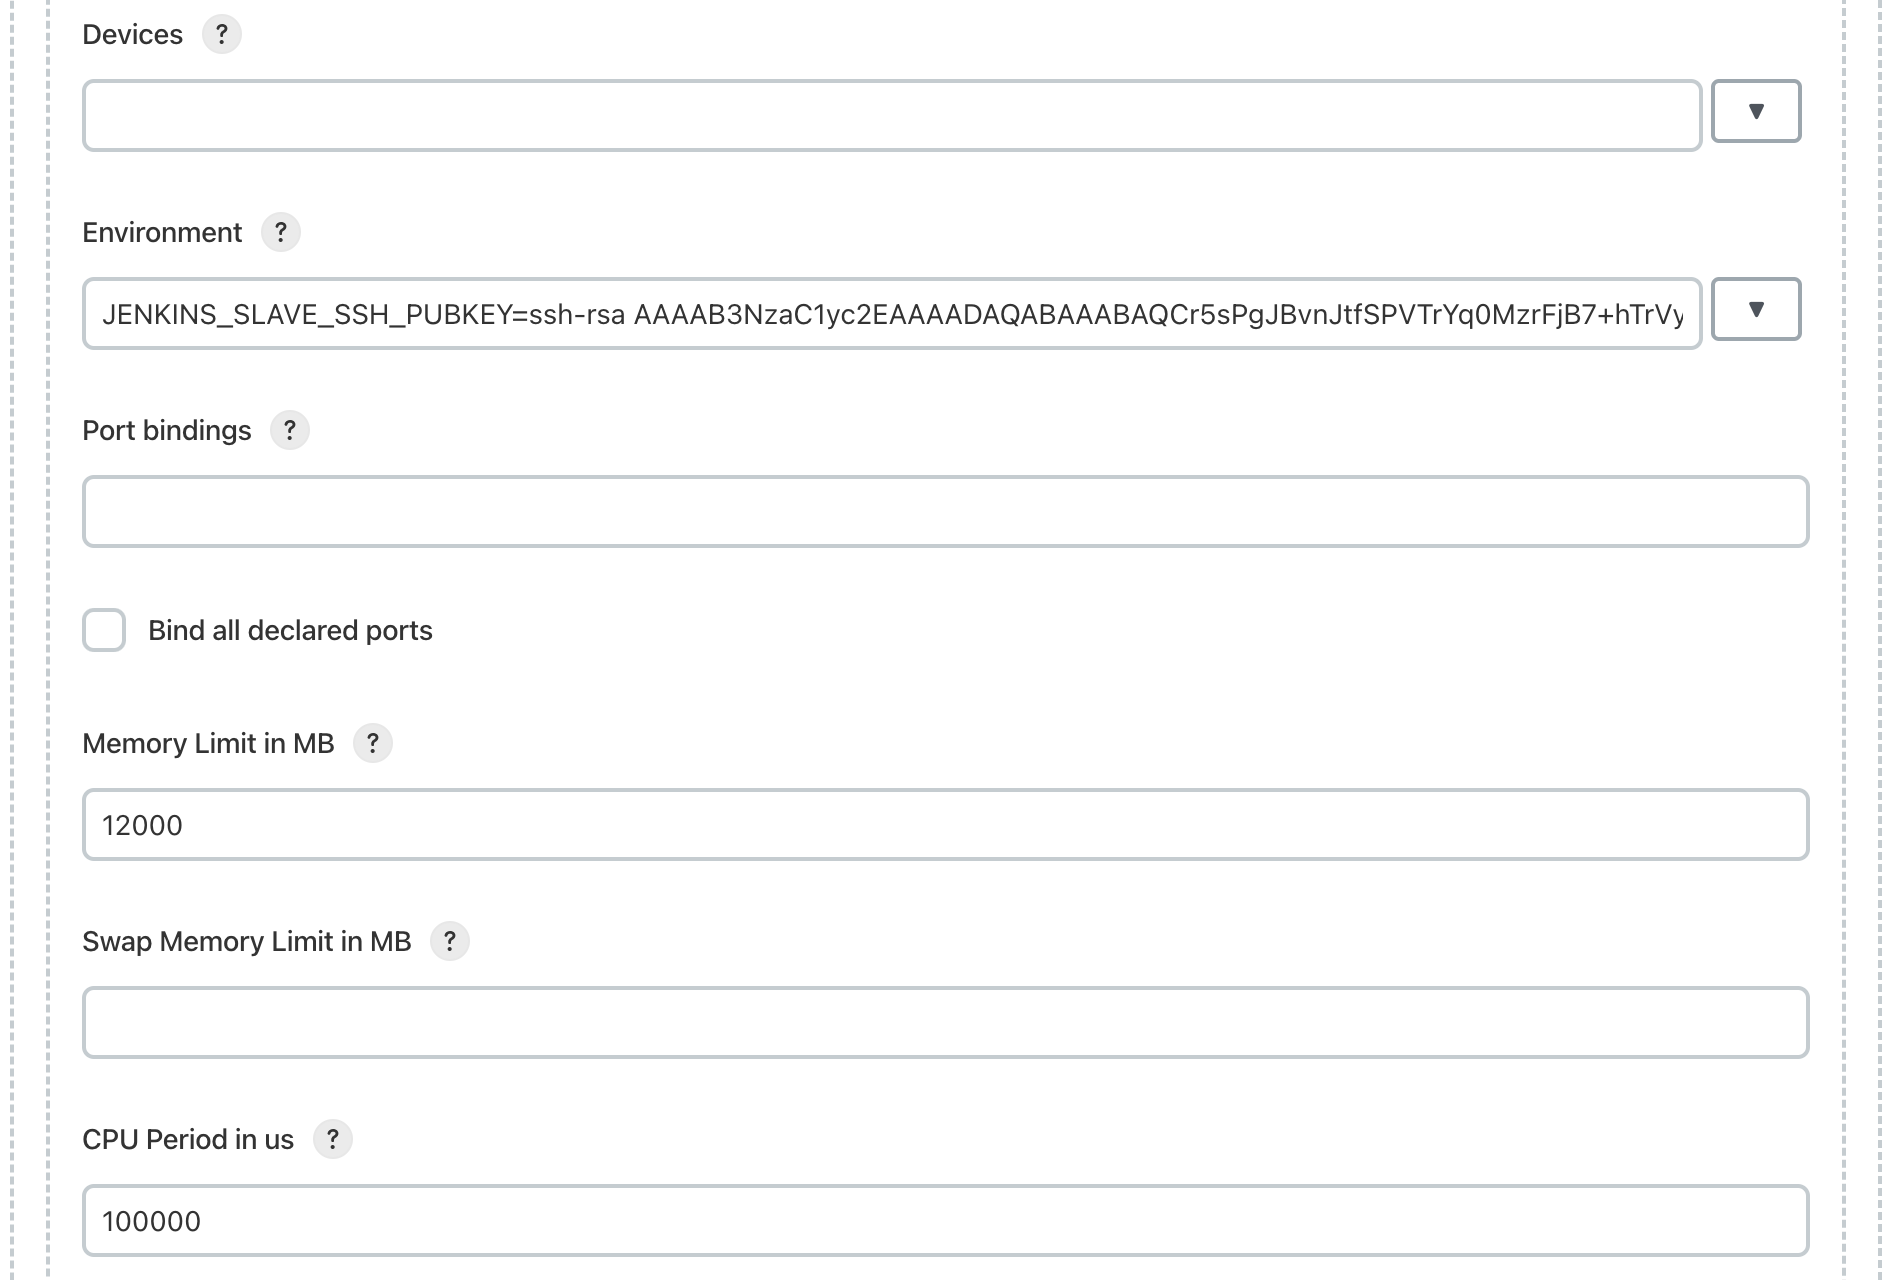
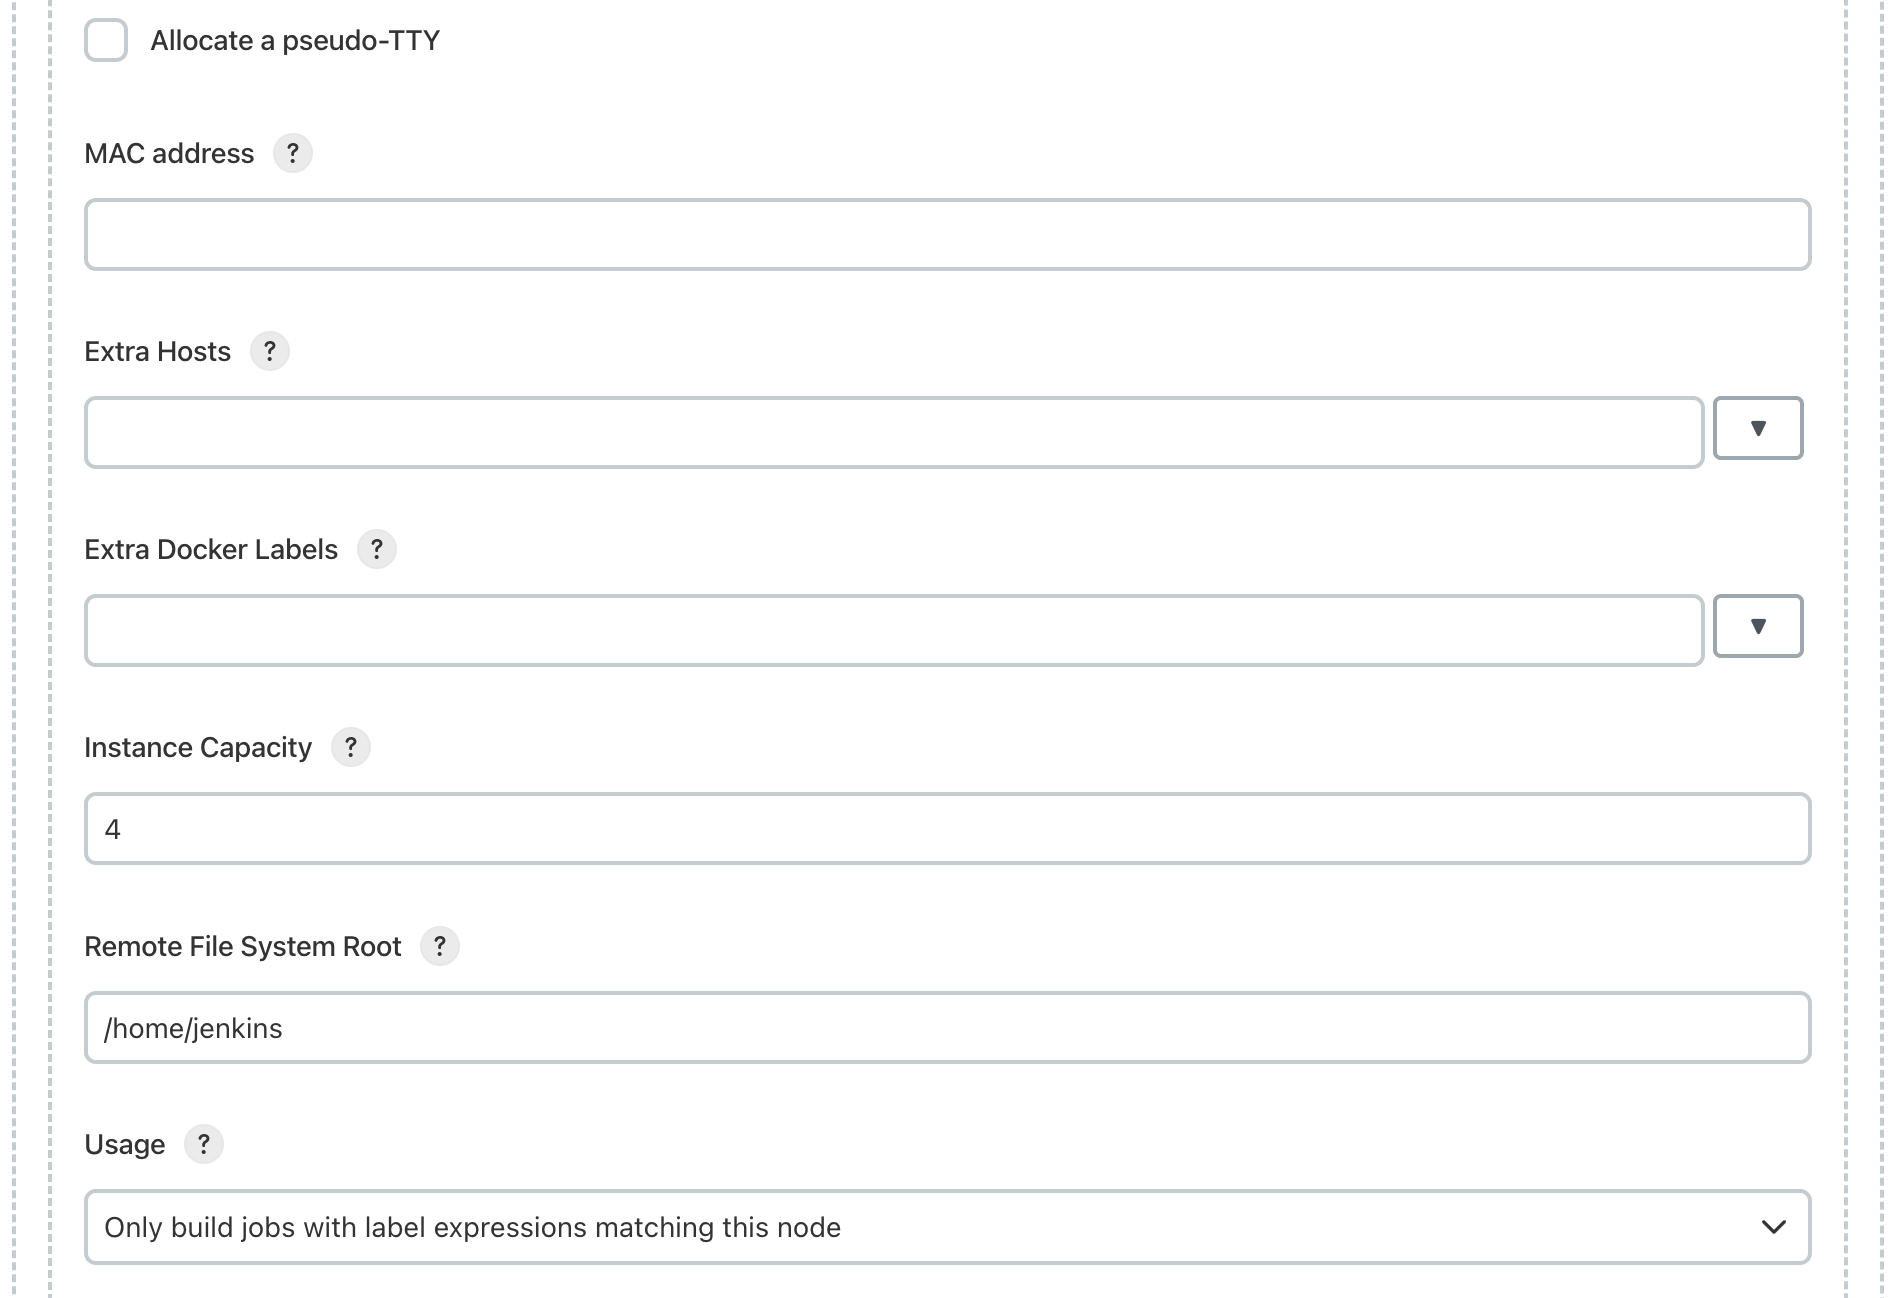
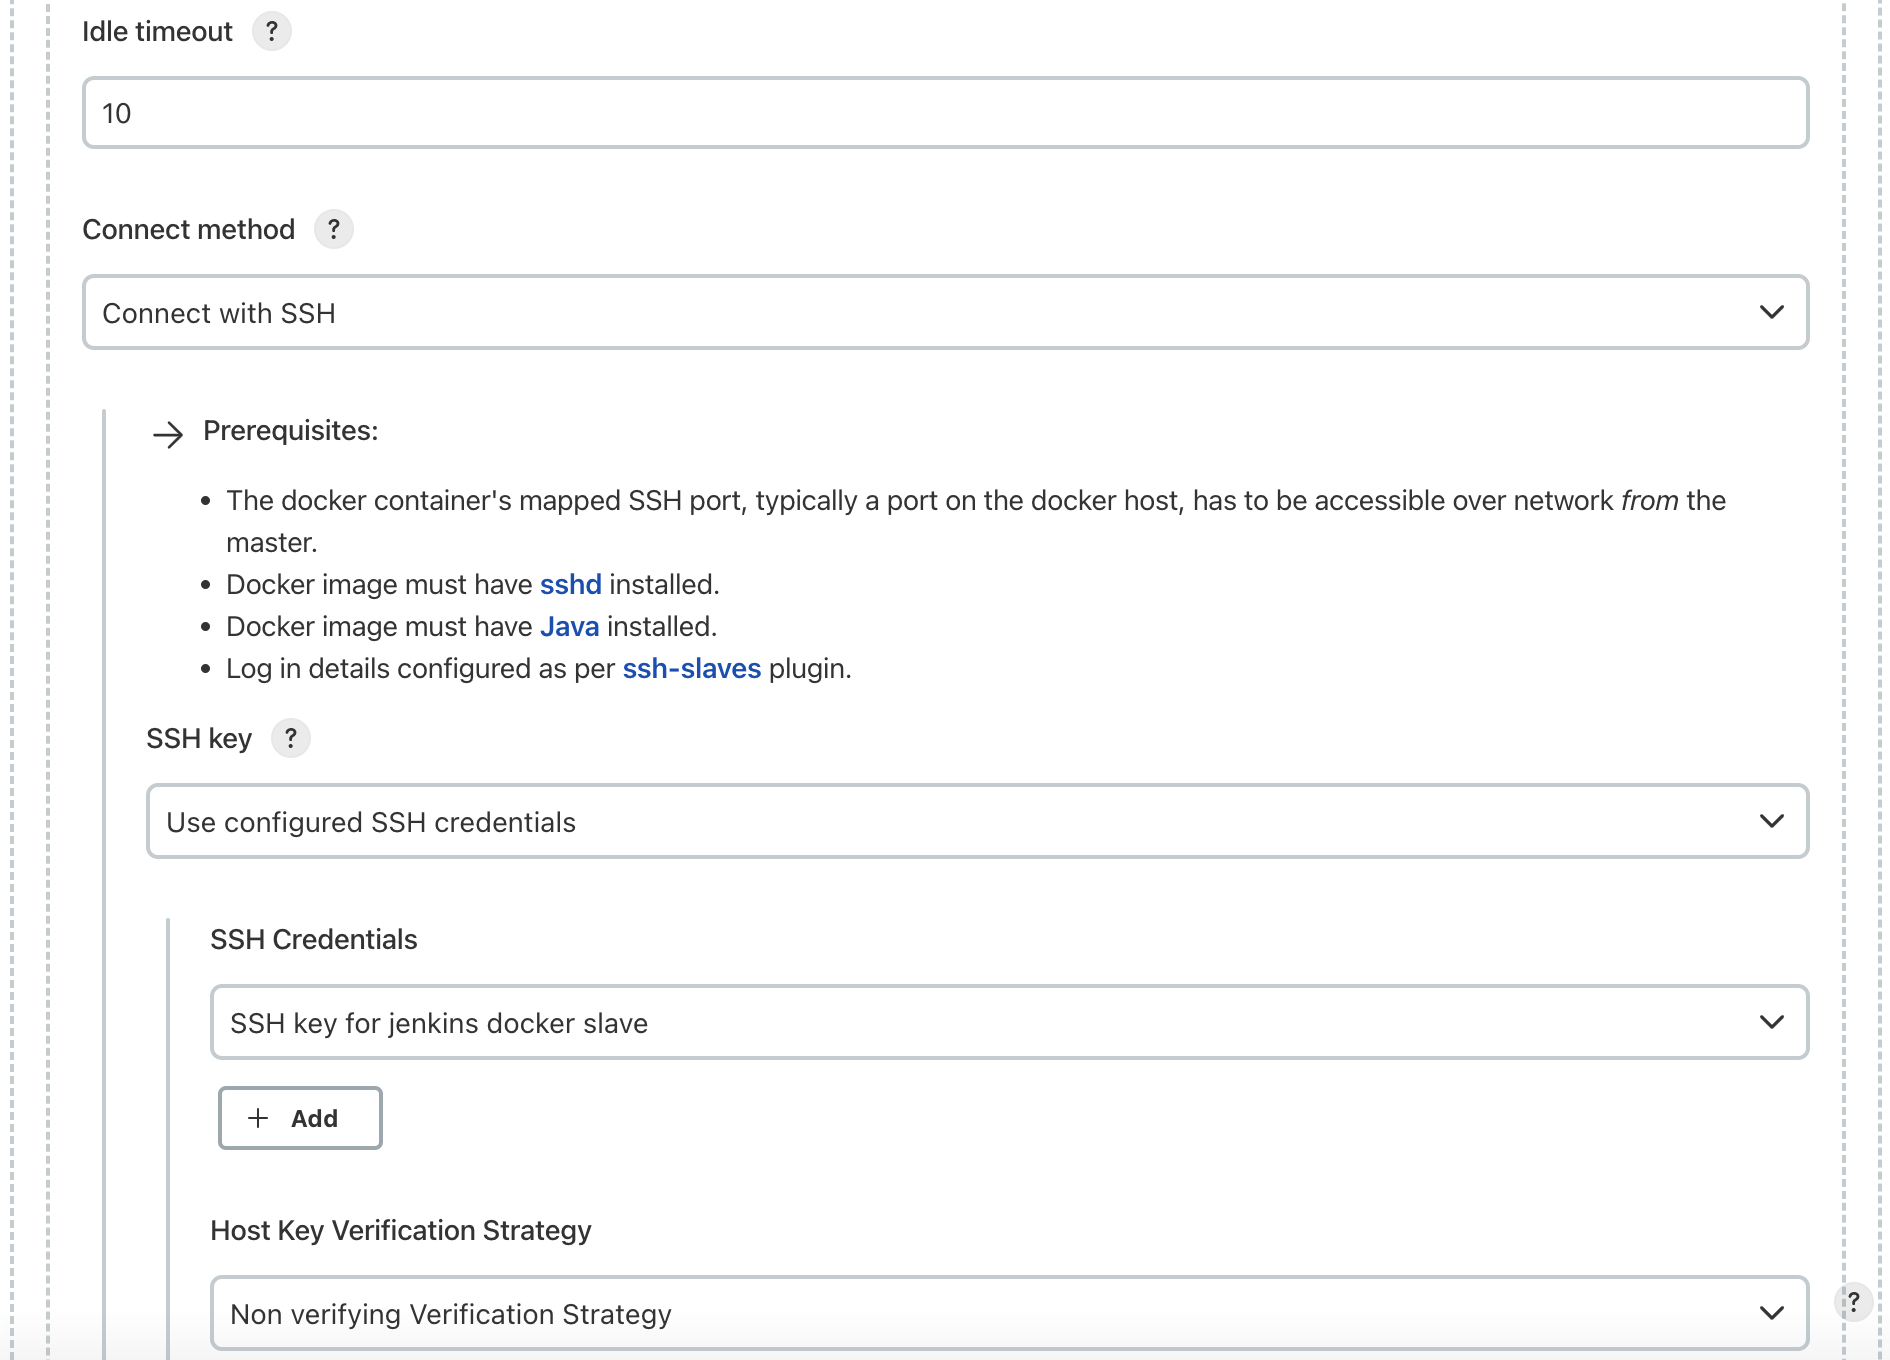
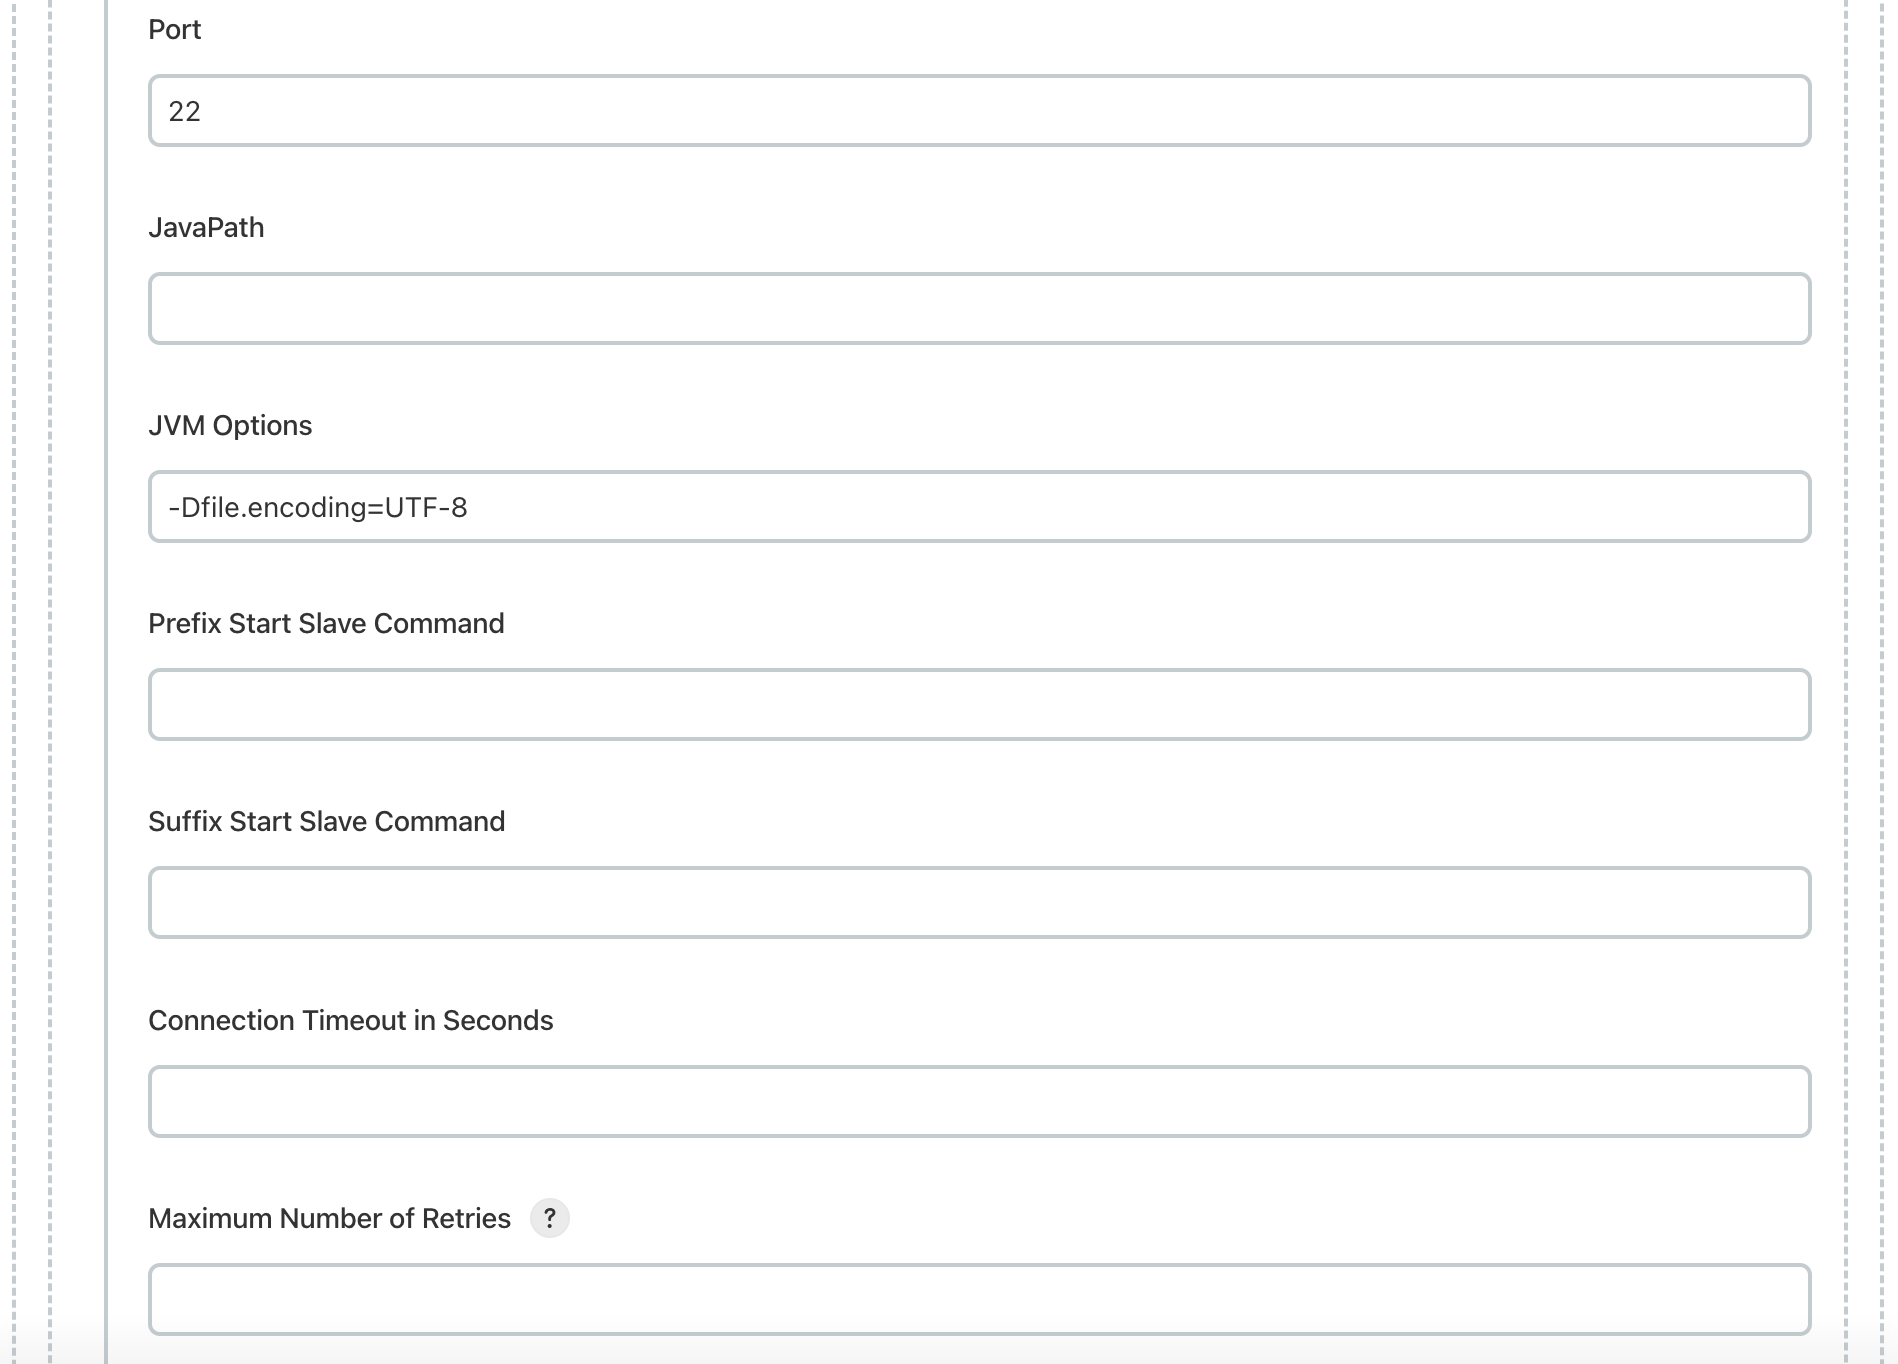
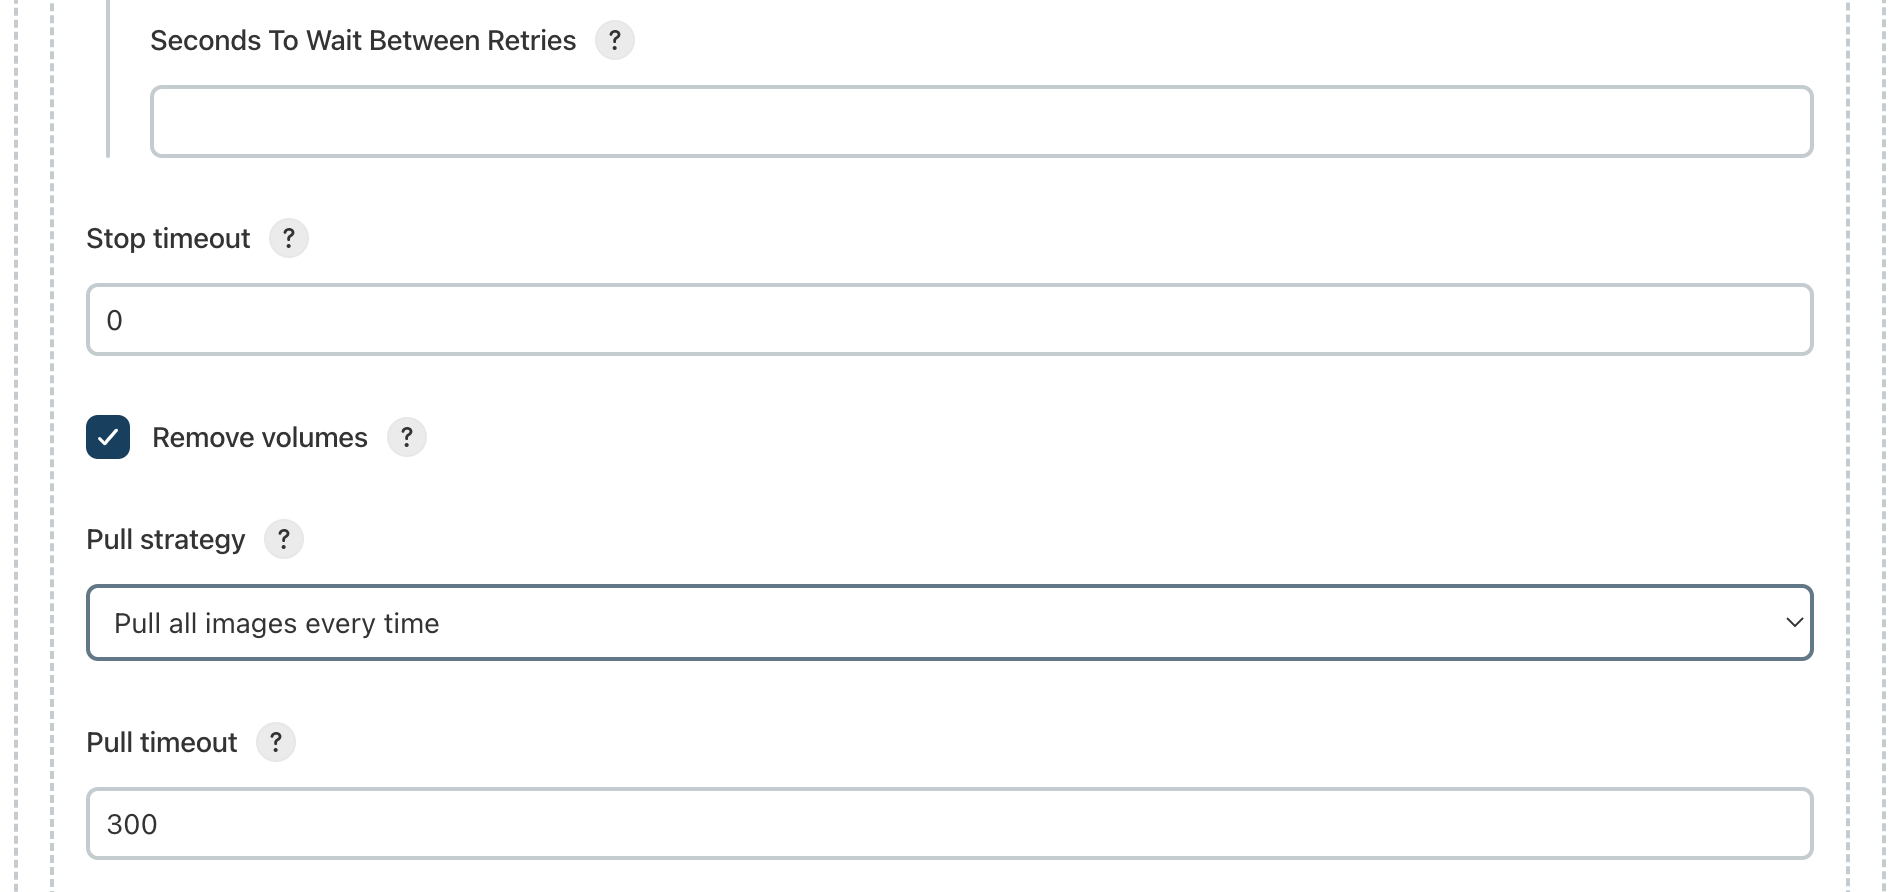
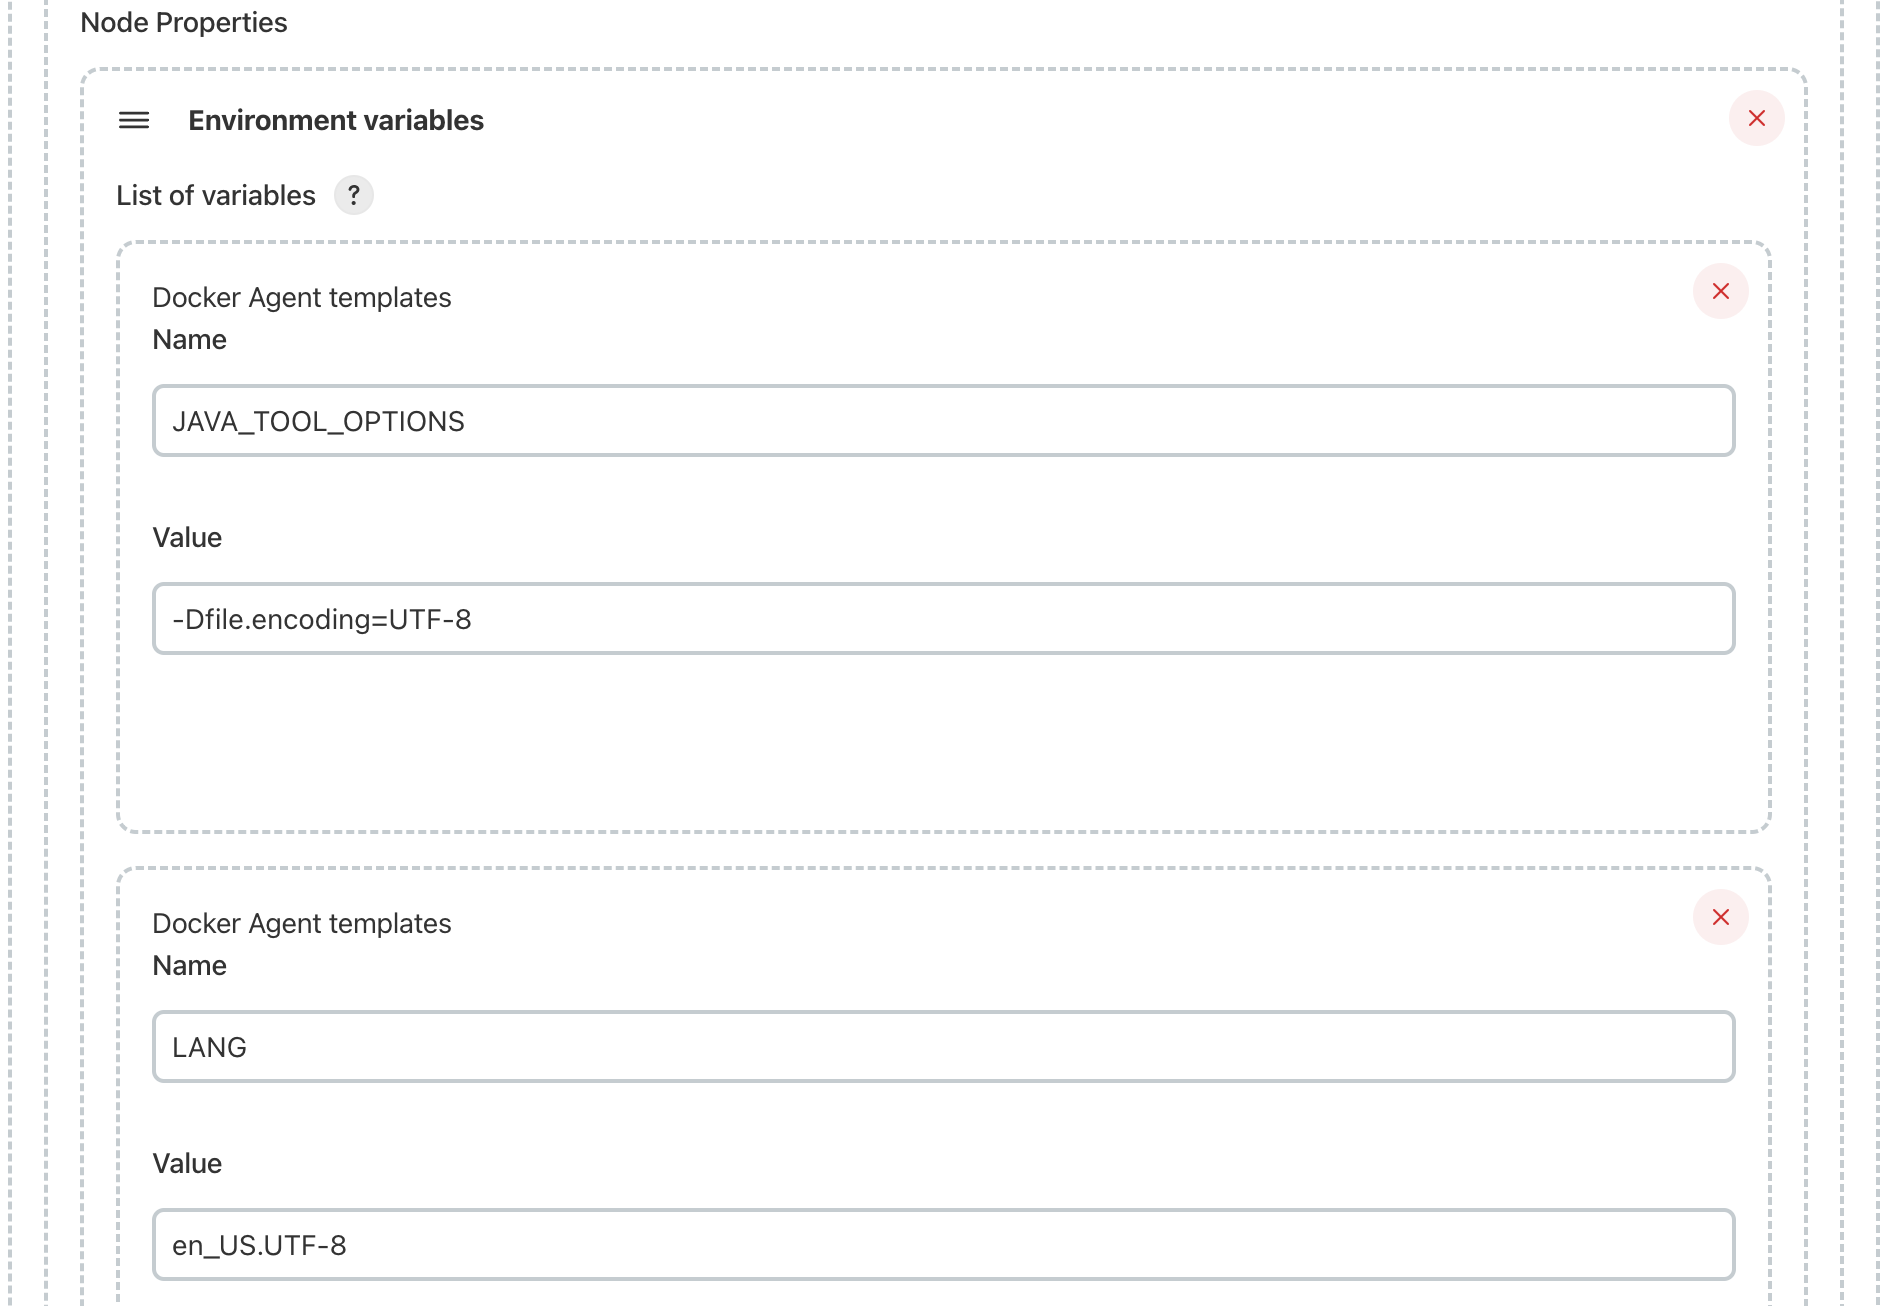
Creating a cloud agent template in Jenkins
For creating a cloud agent template go to the Configure Cloud page, click to the "Add new cloud" button at the bottom of the page and choose Docker. Then fill in all fields like on screenshoots below (some values you can take from existing templates).